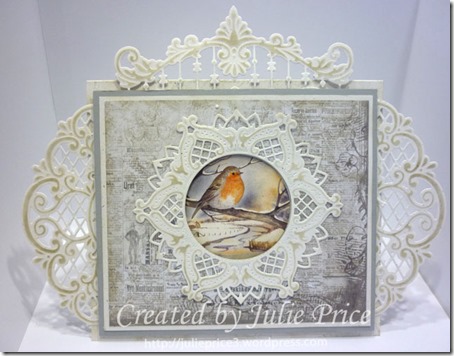
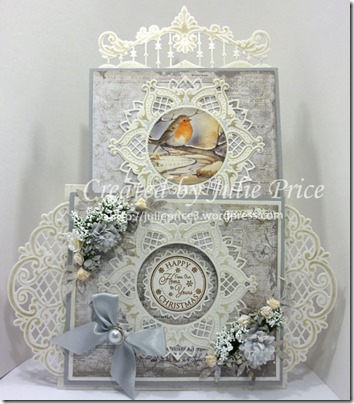
A number of you have asked how I created the slider for my Peace and Joy Christmas card so here goes:
Start with your base card measuring 6 5/8” x 11 3/4” fold and randomly stamp across the edges with the script and Sahara Sand ink:
 Die cut, emboss and ink your die pieces. I have a tutorial on this step here, you will need 2 x Anja Vintage Decoration, 2 x Anja Circle, 1 small Anja Circle and 1 Anja Border, Diana at the Magnolia-licious™ store has a great sale on dies at the moment 25% 0ff all die brands so pop in and take a look, if you don’t see the ones you are after drop Diana an email and I’m sure she will be happy to get them for you
Create the first layer by adding your Anja Vintage Decoration pieces either side of a piece of decorative paper 5 3/4” X 5”
Attach to the card base with double sided tape:
The slider mat layer is created using a piece of grey card 6 1/4” x 5 1/2”, a piece of white card 6” X 5 1/4” and patterned paper 5 3/4” x 5” Attach together with double sided tape and glue (use the glue across the centre area so it doesn’t gape when the aperture is cut) Die cut a 2 1/4” circle through all three pieces from the centre of the mat layer, die cut the same circle from the centre of one of your decorative circle die cuts and glue around the aperture
Stamp your sentiment, punch out and attach to the small decorative circle die cut, Add this to the centre of your base card checking the placement with your prepared mat:
It should now look like this:
Add your slider mat to the base card using 3D tape, You will need to put this down both sides and across the bottom, leaving the top side open for the insert, place over the sentiment layer making sure it is positioned correctly
To create the insert cut a piece of grey card 5 3/4”” x 5” decorate with a paper layer 5 1/2 “ x 4 3/4” adding the Anja border die cut in behind at the top to create the pull out. (I then added another piece of grey card over the border at the back for neatness) Die cut your image with the 2 1/4” Circle die and attach to the decorative circle, then attach to the centre of the insert (you will want to check the placement of the image before doing so, pop your insert into the slider and mark the aperture with a pencil to ensure you have it placed correctly)
It should now look like this:
Finish with some flowers, a sentiment and a bow:
The slider pulls out from the top like this:
Supplies:
Stamps: SU Good Greetings, Stempelglede Postcard from Paris,
LOTV Christmas Circular Sentiments
Paper: MB0146, Magnolia Winter Wonderland Joyful,
Marianne Designs Mattie’s Winter 1
Cardstock: SU Naturals White and Smokey Slate
Ink: SU Sahara Sand , Soft Suede and Basic Grey
Accessories: Marianne Designs Dies: LR0237 Anja’s Circle, LR0269 Anja’s Vintage Decoration, LR0300 Anja’s Border, Silver Satin Ribbon, Pearl Brad, , 1 3/4” and 1” Circle Punch, Prima Pom Pom Flowers, WOC Roses, Kordt & Godt Roses, White Babies Breath, 3D Tape
I hope that you have enjoyed this tutorial and will have a try yourself, This design could easily be adapted using a coloured image for your insert in place of the topper, or by changing the paper and colour choice, you can create a very different feel to the card. I have another winter card tutorial using the same dies here if you would like to try that as well
Happy Creating Hugs Julie P


Stunning card and amazing tutorial Julie, thanks for sharing. Can’t wait to get my dies from Magnolia-licious and try this out.
Gorgeous, Julie. Fabulous tutorial. I love those pretty die cuts and just got a few new Marianne Designs dies this week. Can’t wait to play with them.
Hugz,
Cath
Julie your just doing these cards way to stunning. Thanks for the tutorial. I will save it with the other one.
Hugs.
Thank you so very much Julie for your tutorial I am going to try this, your card looks amazing Hugs Andrea B
THANK YOU !!
Hi Julie ..
What have you done this beautifully !!! Very clearly so, and gorgeous color combination!
Hart, greeting Anja
Thank you so much for this tutorial. grt. Tonny
This is a stunning card, so pretty and elegant – thank you for the wonderful tutorial.
Pauline
x
Thanks for sharing Julie! Nancee 🙂